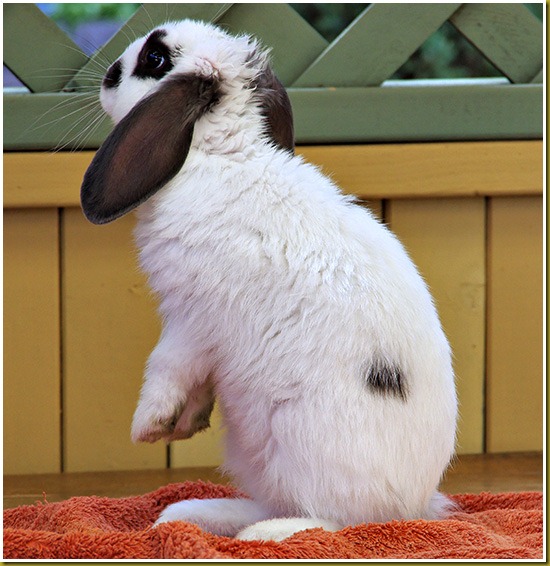
Wabbit Season: I’ve Been Out Shooting Wabbits
Well … out shooting one wabbit anyway …
For those that have not seen any of the Bugs Bunny and Elmer Fudd “It’s wabbit season” cartoons then the above title will not have much meaning. I did a quick Google search for “wabbit season” and found a few Elmer Fudd cartoon samples, one of which I have shown at left as a memory jogger for those who don’t quite remember “Wabbit Season”.
But this is not quite the kind a wabbit (err, rabbit) shooting I am talking about. My rabbit shooting was using a Pentax K-5 loaded with an 8GB SanDisk memory card. What happened was the wife wanted me to ‘mind’ the rabbit, who actually is supposed to be looked after by my son (pause for raucous laughter goes here), while she cleaned out his hutch.

The ‘cleaning of the hutch’ takes some time to complete and after about 15 minutes I was getting mighty bored with minding Floppy. So to make the time go a little faster I decided to go and get my camera, get the Red Back spider webs off it, oil it up, and take some snaps of the wabbit.
Sadly for you lot, especially if you are totally not into pet rabbits, I have decided to share some of my snaps
One thing I learnt very quickly about taking pictures of a rabbit is that they are always on the move—well this one is. This makes it kind of challenging to get good shots because the focus is always having to be reset even on a Pentax K-5 which has one of the fastest auto-focus mechanisms of all the pro-am DSLRs currently on the market.
The other issue with photographing Floppy is that he is white, and as all photographers know, photographing something that is white plays havoc with the automatic light metering.
The following picture shows Floppy trying to make a burrow using the towel my wife puts on the table for him (to make the table a little more ‘earthy’ like—compared to the slippery varnish finish on a wood table).
As I had the camera in sequence shot mode, and I will talk more about that in the next paragraph, I have managed to get the shot just before the main picture as well—which is shown in the insert. In the insert picture you can see Floppy lifting the towel up with his nose. This was after pulling the edge up with his teeth so he could his nose under it. Sadly his attempt to make a burrow failed because once he got the towel up to a certain height it just fell over to the side and his ‘burrow’ collapsed—such is life.
As I mentioned, by this time I had turned on hi-speed sequence shooting on the K-5. This is because I noticed that, as Floppy is always on-the-move, quite often what he did after I took the ‘main’ frame was more interesting (in relative terms, this is after all just a rabbit) than the picture I took first.
Here is Floppy playing peek-a-boo shoot-me-if-you-can—with one of his floppy ears up and the other down.
The following shot gives you a better idea of the overall ‘play’ area my son created for Floppy on those occasions that he gets to have some fun outside of his somewhat confined and restricted hutch.
I wonder if I can get any advertising income from Blue Tongue beer, Hewlett Packard, or Dell for the product packaging placement in this picture?
Oh! Can you find the wascally wabbit? Sadly his white and black fur does not give him the best camouflage in this setting. If only he had blue fur you would never find him.
Next is the old ‘Rabbit in a box trick”! Or is that ‘Rabbit in a hat’? Hmmmm.
This next shot shows the incredible range of the 18-135 mm zoom I was using on the K-5.
The larger wide shot is at 18 mm and the rabbit is that white spot you can just make out in the very middle of the picture way down against the back wall of the pergola sitting on the Dell computer box. The insert is a crop taken from the 135 mm shot taken just after the first picture from the same location. Modern DSLR zooms lenses are amazing.
This last picture is of the wabbit resting—plumb wore out from all that posing and modelling.
Well … at least they weren’t cat pictures!
All images were processed from RAW/PEF format using DxO and then any final editing (histogram adjustments, cropping, and sharpening) was done using Photoshop Elements v9.


