Single-shot HDR
I love photography. Sadly I don’t do much of it any more. But on the upside I do get to write about something related to photography now and then here on my site, and I really wanted to post something today about photography. I decided to do a really quick short note on doing HDR (High Dynamic Range) pictures.
HDR pictures, or to give them their full name, HDRI (High Dynamic Range Images), are basically images made up from more than one image that are sandwiched or ‘flattened’ together like sheets of paper using a computer-based raster editing tool like Adobe Photoshop Creative Suite, Adobe Photoshop Elements (PSE), Corel PhotoPaint, or HDR Express from Unified Color, or one of many other tools that can do HDR.
To do a really good and amazing HDR picture you would normally use a tri-pod and you would take two or three or four or more photographs of exactly the same thing. With each photograph you would vary the exposure. For a typical three shot HDR you would probably take a shot at –2 (2 stops under), +2 (2 stops over), and 0 (at the correct exposure). Then when you blended these into the one picture using your preferred raster editing tool you would end up with a picture with about 10 stops of exposure range—the 6 stops in the correct exposure with +2 and –2 blended in.
But sometimes for some reason you can’t take three or four or five pictures using a tri-pod. For example, if the subject is moving then there is no way you can take three pictures exactly the same that can be blended into the one picture.

The first thing you must do is take the picture as a RAW. Starting out with a JPG means that so much of the information about the picture has already been lost in the RAW to JPG conversion that there is not enough picture information left to do what has to be done next.
Starting with the one correctly exposed RAW you use your preferred RAW imaging tool (SilkyPix, Bibble, PhotoShop, Adobe Camera Raw, and PSE can work with most RAWs) to create separate new JPG pictures.
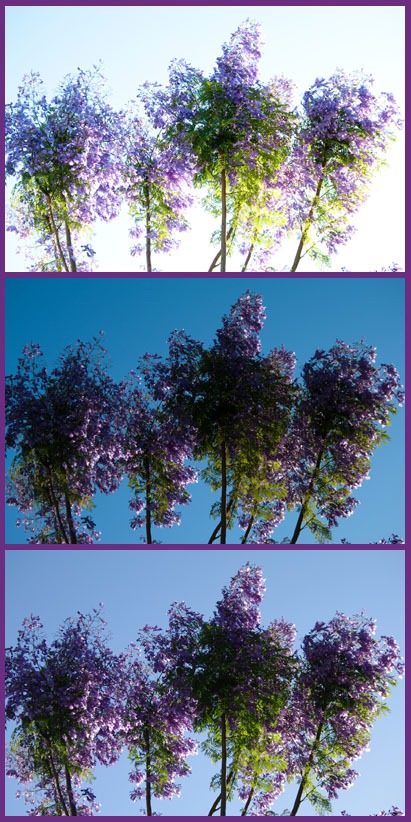
In the case of my Jacaranda picture I created three pictures: one at +2 stops (I wanted to force in more highlights in the branches and foliage), another at –1 stop (with the plan of making the sky come in a little darker), and the final one was correctly exposed.
These three pictures are shown at left in that order.
The next step is to use your preferred raster editing tool to merge these three pictures into the one picture. Most raster editors either call this blending or merging, or they may even call it something like ‘Create HDR’.
The tool I use is PhotoShop Elements (PSE) and I still only have version 8 as I have not bought the upgrade yet. In PSE8 there is a “PhotoMerge Exposures” option on the File menu under New that lets you merge multiple pictures into the one. Other raster editors that support this capability will have a similarly named option buried on one of their menus. If you are not sure if your raster editing tool can do HDR merges then check the Help or go online to the vendor’s Web site and check the feature list.
So using this option in PSE8 I loaded in the three pictures above, which remember all came from the one RAW image. After you do the merge you usually have a pile of options where you can change the saturation, clarity, luminosity, shadow depth, RGB histogram, sharpness, and so on. But with this merge I have done here I have not done any post-merge tweaking.
The following HDR image is the basic merge as done by PSE8.
So you can compare, the following picture is the in-camera JPG taken at the same time. My Pentax K-7 allows me to take a RAW and a JPG together at the same time.
For some the HDR image will look over-saturated, and this is a common result of doing HDRs—whether they be single-shot HDRs like this or ‘true’ multiple shot HDRs. And often this is the effect that someone doing a HDR is after. But if not then using the post-HDR sliders you can tame this down; but as I pointed out above I have not done any post-HDR merge changes to my HDR picture.
Well I wanted to keep this short an punchy and that is about it.
If you want to find out more about HDRs there are thousands of photo sites across the Web that talk about different approaches and methods. Just Google “HDR” or “High Dynamic Range”, or go to the Adobe site where they have some tutorials there, albeit focussed on HDR using Adobe tools. You can also try the Luminous-Landscape, Photo.net, or the forums at DP Review. Also the makers of HDR Express (Unified Color) have some examples at their site which you can get to via this item at DP Review.


